Hi guys I hope you doing well. Today we learn what is Riverpod and how & why you implement it in your flutter project. so first we understand what is riverpod; Riverpod state management solution in a flutter It a basically a Provider, but of a different type. It has some advantages over a provider in that it is compile safe, does not have any limitation as a provider have, and does not also depend on flutter. Riverpod support multiple providers of the same type, combining asynchronous provider, and adding providers from anywhere. I think you understand a little bit about what is Riverpod. So now we starting our coding part in step by steps
Step 1: Implement Riverpod State Management package in your project
To implement the package you go to the official riverpod url: riverpod: ^2.1.1 and import to your pubspec.yaml File like this
dependencies:
  flutter_riverpod: ^2.0.0-dev.5
Step 2: Create a provider using StateProvider
Now this step you can use StateProvider in your Main.dart flie like this
import 'package:flutter/material.dart';
import 'package:flutter_riverpod/flutter_riverpod.dart';
void main() {
  runApp(
    ProviderScope(
      child: MyApp(),
    ),
  );
}

class MyApp extends StatelessWidget {
  const MyApp({Key? key}) : super(key: key);

  @override
  Widget build(BuildContext context) {
    return MaterialApp(
      title: 'Counter App',
      home: HomePage(),
    );
  }
}
final counterStateProvider = StateProvider<int>((ref) {
  return 0;
});
Step 3: Create a Consumer class and extend ConsumerWidget
class HomePage extends ConsumerWidget {
  @override
  Widget build(BuildContext context, WidgetRef ref) {
    // 1. watch the counterStateProvider
    final counter = ref.watch(counterStateProvider);
    return Scaffold(
      body: Center(
          child:  Text(
            'Value: $counter',
            style: Theme.of(context).textTheme.headline4,
          )
      ),
    );
  }
}
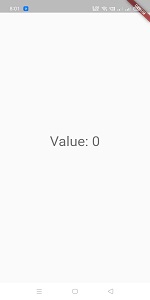
Now run you app then you see that the value is 0 which is our initial value and we can access the value using final counter = ref.watch(counterStateProvider); in our app. Now we moving next step
Step 4: Use ref.read() to change the state
Now we adding two FloatingActionButton which one is for increasing the state value and the other is for decreasing the state value. Here is the Full code
import 'package:flutter/material.dart';
import 'package:flutter_riverpod/flutter_riverpod.dart';
void main() {
  runApp(
    ProviderScope(
      child: MyApp(),
    ),
  );
}

class MyApp extends StatelessWidget {
  const MyApp({Key? key}) : super(key: key);

  @override
  Widget build(BuildContext context) {
    return MaterialApp(
      title: 'Counter App',
      home: HomePage(),
    );
  }
}
final counterStateProvider = StateProvider<int>((ref) {
  return 0;
});

class HomePage extends ConsumerWidget {
  @override
  Widget build(BuildContext context, WidgetRef ref) {
    // 1. watch the counterStateProvider
    final counter = ref.watch(counterStateProvider);
    return Scaffold(
      appBar: AppBar(
        title: Text('Counter App'),
        centerTitle: true,
      ),
      body: Center(
          child:  Text(
            'Value: $counter',
            style: Theme.of(context).textTheme.headline4,
          )
      ),
      floatingActionButton: Padding(
        padding: EdgeInsets.only(left: 30),
        child: Row(
          mainAxisAlignment: MainAxisAlignment.spaceBetween,
          children: <Widget>[
            FloatingActionButton(
              // access the provider via ref.read(), then increment its state.
              onPressed: () => ref.read(counterStateProvider.state).state++,
              child: Icon(Icons.add),
            ),
            FloatingActionButton(
              // access the provider via ref.read(), then increment its state.
              onPressed: () => ref.read(counterStateProvider.state).state--,
              child: Icon(Icons.remove),
            ),
          ],
        ),
      ),
    );
  }
}
Thanks for reading this article ❤
If I got something wrong? Let me know in the comments. I would love to improve.
Clap 👏 If this article helps you.
If we got something wrong? Let me know in the comments. we would love to improve.
and If you like our article then you also read this: How to create Onboarding Screen Sliders on Flutter, How to implement Date Picker in a flutter, How to create an animated liquid wave progress bar in Flutter