Hi everyone, We hope that everyone is doing well and trying something new. We are pleased to hear that you have begun a series of e-commerce App UI in Flutter screens on our website. If you would like to learn more about developing new e-commerce applications, please check out our episode.
E-Commerce App:
An electronic commerce application, or simply e-commerce app, is a kind of software platform that facilitates online purchases and sales of goods and services.I can give you an overview of the functionality that a typical e-commerce app will include in January 2022. Nevertheless, since then, the sector can have undergone modifications and developments.
Here are the key components and features of a typical e-commerce app in today’s context:
- User Registration and Authentication: Users can create accounts, sign in, and manage their profiles. Security features like two-factor authentication are often included to protect user accounts.
- Product Catalog: E-commerce apps display a wide range of products and services with details, images, prices, and descriptions. Advanced filtering and search options help users find products easily.
- Shopping Cart: Users can add products to their shopping carts, review their selections, and proceed to checkout. The cart allows for adding or removing items and specifying quantities.
- Secure Payment Processing: E-commerce apps integrate with payment gateways to enable secure online payments.
- Order Management: Users can track the status of their orders, view order history, and receive notifications on order updates, including shipping and delivery information.
- Reviews and Ratings: Customers can leave reviews and ratings for products and sellers. This feature helps build trust and allows other users to make informed decisions.
- Seller Accounts: E-commerce platforms often have a separate interface for sellers to manage their product listings, orders, and customer interactions.
- Recommendations and Personalization: E-commerce apps use algorithms to suggest products to users based on their browsing and purchase history. Personalization enhances the shopping experience.
- Mobile Responsiveness: E-commerce apps need to be optimized for mobile devices to cater to the growing number of mobile shoppers.
So first, we start with Introduction Screens in flutter, we also created on our site, but this time we created an e-commecre screen related to the UI screen. so there are some steps.
Step 1. Create a new file name with Constent.dart and store all the usable color, padding, radius, text style, list, etc.
import 'package:flutter/material.dart';

const kPrimaryColor = Color(0xFFFF8084);
const kAcentColor = Color(0xFFF1F1F1);
const kWhiteColor = Color(0xFFFFFFFF);
const kLightColor = Color(0xFF808080);
const kDarkColor = Color(0xFF303030);
const kTransperentColor = Colors.transparent;

const kRadious = 0.0;


const kTransparent = Colors.transparent;

const kDefaultPadding = 24.0;
const kLessPadding = 10.0;
const kFixPadding = 16.0;
const kLess = 4.0;

const kShape = 30.0;

const kRadius = 0.0;
const kAppBarHeight = 56.0;

const kHeadTextStyle = TextStyle(
  fontSize: 24.0,
  fontWeight: FontWeight.bold,
);

const kSubTextStyle = TextStyle(
  fontSize: 16.0,
  color: kLightColor,
);

const kTitleTextStyle = TextStyle(
  fontSize: 20.0,
  color: kPrimaryColor,
);

const kDarkTextStyle = TextStyle(
  fontSize: 20.0,
  color: kDarkColor,
);

const String pieChart = 'Assets/Testing/pieChart.png';
const String trophy = 'Assets/Testing/trophy.png';
const String chat = 'Assets/Testing/chat.png';
const String whiteShape = 'Assets/Testing/whitebg.svg';


List<Map<String, String>> introData = [

  {
    'image': pieChart,
    'headText': 'Track your routine',
    'descText': "Whether it's sets, reps, weight used, you can track it all with our intuitive interface.",
  },
  {
    'image': trophy,
    'headText': 'Set personal goals',
    'descText': "We're all in the gym for a reason: goals. set goals for diet and fitness.",
  },
  {
    'image': chat,
    'headText': 'Chat with others',
    'descText': "Inspire and help each other reach fitness and diet goals.",
  },
];
Step 2. Open your main.dart file and add some code in there.
import 'package:flutter/material.dart';
import 'package:google_fonts/google_fonts.dart';
import 'package:new_testing/Intro/intro.dart';
import 'package:new_testing/constent.dart';

void main() {
  runApp(App());
}

class App extends StatefulWidget {
  App({super.key});

  @override
  State<App> createState() => _AppState();
}

class _AppState extends State<App> {
  @override
  Widget build(BuildContext context) {
    return MaterialApp(
      debugShowCheckedModeBanner: false,
      theme: ThemeData(
        primaryColor: kPrimaryColor,
        accentColor: kAcentColor,
        fontFamily: 'Poppins',

      ),
      home: Intro(),
    );
  }
}
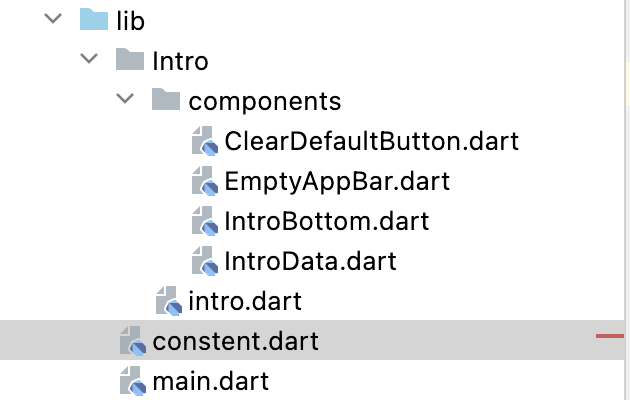
Step 3. Now you create a new folder inside the lib folder, like Intro, and create a file named intro.dart. and inside the Intro folder, you create a folder name with components,, and inside this, you create a four file name with IntroData, IntroButton, EmptyAppBar, and ClearDefaultButton.dart files respectively.
intro.dart
import 'package:flutter/material.dart';
import 'package:new_testing/Intro/components/EmptyAppBar.dart';
import 'package:new_testing/Intro/components/IntroBottom.dart';
import 'package:new_testing/Intro/components/IntroData.dart';
import 'package:new_testing/constent.dart';

class Intro extends StatefulWidget {

  @override
  _IntroState createState() => _IntroState();
}

class _IntroState extends State<Intro> {
  var _controller = PageController();
  var _currentPage = 0;

  @override
  Widget build(BuildContext context) {
    _controller.addListener(() {
      setState(() {
        _currentPage = _controller.page!.round();
      });
    });
    return Scaffold(
      backgroundColor: kAcentColor,
      appBar: EmptyAppBar(),
      body: Column(
        children: [
          Expanded(
            child: PageView.builder(
              itemCount: introData.length,
              itemBuilder: (context, index) => IntroData(

                introImage: introData[index]['image'] ?? '',
                headText: introData[index]['headText'] ?? '',
                descText: introData[index]['descText'] ?? '',

              ),
              onPageChanged: (page) {
                setState(() {
                  _currentPage = page;
                });
              },
            ),
          ),
          IntroBottom(currentPage: _currentPage)
        ],
      ),
    );
  }
}
ClearDefaultButton.dart
import 'package:flutter/material.dart';
import 'package:new_testing/constent.dart';


class ClearDefaultButton extends StatelessWidget {
  final Function press;
  final String name;
  ClearDefaultButton({required this.press, required this.name,});
  @override
  Widget build(BuildContext context) {

    return TextButton(
        onPressed: (){
          press;
        },
        child: Container(
          padding: EdgeInsets.symmetric(vertical: kDefaultPadding),
          child: Text(
            name.toUpperCase(),
            style: TextStyle(
              color: kPrimaryColor,

            ),
          ),
        ),
    );
  }
}
EmptyAppBar.dart
import 'package:flutter/material.dart';
import 'package:new_testing/constent.dart';

class EmptyAppBar extends StatelessWidget implements PreferredSizeWidget{

  @override
  Size get preferredSize => const Size.fromHeight(kAppBarHeight);
  Widget build(BuildContext context) {
    return AppBar(
      backgroundColor: kWhiteColor,
      elevation: kRadius,
      automaticallyImplyLeading: false,
    );
  }
}
IntroBottom.dart
import 'package:flutter/material.dart';

import '../../landing/Landing.dart';
import '../Constent.dart';

class IntroBottom extends StatelessWidget {
  const IntroBottom({Key? key, required int currentPage,})  : _currentPage = currentPage,
        super(key: key);

  final int _currentPage;

  @override
  Widget build(BuildContext context) {
    return Row(
      mainAxisAlignment: MainAxisAlignment.center,
      children: [
        (_currentPage == 0 || _currentPage == 1)
            ?
            TextButton(
                onPressed: () => Navigator.of(context).push(
                    MaterialPageRoute(
                      builder: (context) => Landing(),
                    ),
                  ),

                child: Text('Skip')
            )
            :
        Container(),
        Container(
          width: MediaQuery.of(context).size.width / 2,
          padding: EdgeInsets.symmetric(vertical: kDefaultPadding),
          child: LinearProgressIndicator(
            backgroundColor: kWhiteColor,
            value: (_currentPage + 1) / (introData.length + 0),
            valueColor: AlwaysStoppedAnimation<Color>(kPrimaryColor),
          ),
        ),
        (_currentPage == 2)
            ?
        TextButton(
            onPressed: () => Navigator.of(context).push(
              MaterialPageRoute(
                builder: (context) => Landing(),
              ),
            ),

            child: Text('Done')
        )
            : Container()
      ],
    );
  }
}
In there, we navigate to the user landing() page, which we create in the next article, Landing Screen. Right now, you can navigate to any other screen that you created.
IntroData.dart
import 'package:flutter/material.dart';
import 'package:flutter_svg/flutter_svg.dart';
import 'package:new_testing/constent.dart';

class IntroData extends StatelessWidget {
  final String introImage, headText, descText;

  IntroData({required this.introImage, required this.headText, required this.descText});


  @override
  Widget build(BuildContext context) {

    return Column(
      children: [

        Expanded(
          flex: 0,
          child: Stack(
            children: [
              SvgPicture.asset(
                whiteShape,
                color: kWhiteColor,
                fit: BoxFit.cover,
              ),
              Positioned(
                top: 175.0,
                right: 0,
                left: 0,
                child: Image(
                  image: AssetImage(introImage),
                  height: 150.0,
                ),
              ),
            ],
          ),
        ),

        Text(
          headText,
          textAlign: TextAlign.center,
          style: kHeadTextStyle,
        ),
        Padding(
          padding: const EdgeInsets.all(kDefaultPadding),
          child: Text(
            descText,
            textAlign: TextAlign.center,
            style: kSubTextStyle,
          ),
        ),
      ],
    );
  }
}
Step 4: Import the images into your project. You can change and replace the image name and folder as well.
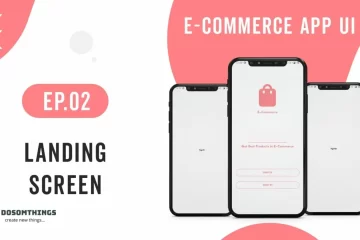
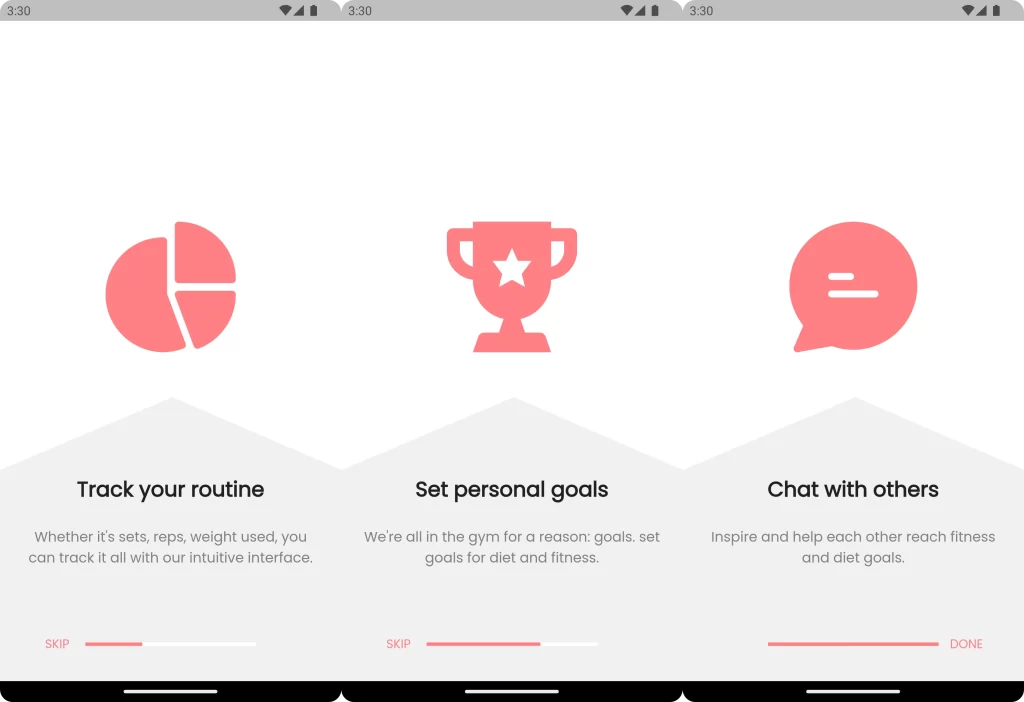
After completing all the steps, run your project, and the result is:
Output
Conclusion:
In conclusion, the implementation of introduction screens in Flutter is a critical aspect of creating a positive and engaging user experience. Specifically, it serves as a bridge between the user and the app’s core functionality, thereby making it a valuable tool for user onboarding and retention. Moreover, when thoughtfully designed and continuously improved, introduction screens can significantly contribute to the overall success of your Flutter app by making a strong first impression and guiding users effectively.