
Hi guys I think you all are doing well in this article we create and implement a Navigation drawer in our Flutter project. Now we understand what is Navigation Drawer it navigates the user into multiple pages of the apps which means navigating to the user all other pages or places. The navigation drawer is added using the Drawer widget. It can be opened via a swipe gesture or by clicking on the menu icon in the app bar. Typically, the navigation drawer opens up from the left side of the screen, but you can also configure it to open from the right side (for the LTR text settings). When it opens, the drawer covers almost 60–70 percent of the screen, and to close it, you can simply swipe or click outside the drawer. But in this tutorial, we create a new and beautiful drawer that attracted the user to your app. Now go to the coding part
Step 1: First implement the Flutter Zoom Drawer Package for Navigation Drawer
in this attractive Navigation Drawer, you have to add flutter_zoom_drawer 3.0.3 package into your Flutter project like this
dependencies:
  flutter_zoom_drawer: ^3.0.3
Step 3: Open your main.dart file
import 'package:flutter/material.dart';
import 'package:flutter/services.dart';
import 'NavigationDrawer/home_page.dart';


void main() {
  WidgetsFlutterBinding.ensureInitialized();
  SystemChrome.setEnabledSystemUIMode(SystemUiMode.immersiveSticky, overlays:[]).then(
        (_) => runApp(MyApp()),
  );
 // runApp(MyApp());
}

class MyApp extends StatelessWidget {

  @override
  Widget build(BuildContext context) {

    return new MaterialApp(home: new HomePageNavDrawer());
  }
}
in the void main() function I am adding SystemChrome.setEnabledSystemUIMode() because this thing you hiding your bottom navigation bar for the entire app.
Step 4: Create and open HomePageNavDrawer.dart file
import 'package:flutter/material.dart';
import 'package:flutter_zoom_drawer/flutter_zoom_drawer.dart';
import 'package:navigationdrawer/NavigationDrawer/payment_page.dart';
import 'menu_page.dart';

class HomePageNavDrawer extends StatefulWidget {
  const HomePageNavDrawer({Key? key}) : super(key: key);

  @override
  State<HomePageNavDrawer> createState() => _HomePageNavDrawerState();
}

class _HomePageNavDrawerState extends State<HomePageNavDrawer> {

  @override
  Widget build(BuildContext context) =>  ZoomDrawer(

    mainScreen: PaymentPage(),
    menuScreen: MenuPage()

  );

}
we implement ZoomDrawer() it will want mainScreen and menuScreen so Now we create two more classes oe pages like Payment.dart and MenuPage.dart
Step 5: Now we create two classes like Payment.dart,Menupage.dart
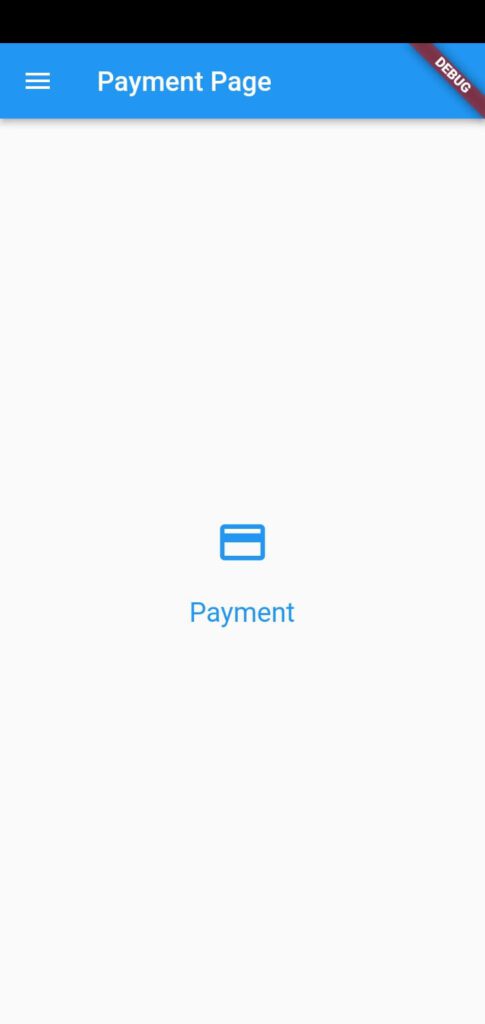
Payment.dart
import 'package:flutter/material.dart';
import 'menuwidget.dart';

class PaymentPage extends StatefulWidget {
  const PaymentPage({Key? key}) : super(key: key);

  @override
  State<PaymentPage> createState() => _PaymentPageState();
}

class _PaymentPageState extends State<PaymentPage> {
  @override
  Widget build(BuildContext context) => Scaffold(
    appBar: AppBar(
      backgroundColor: Colors.blue,
      title: Text('Payment Page'),
      leading: MenuWidget(),
    ),
    body: Center(
      child: Column(
        mainAxisAlignment: MainAxisAlignment.center,
        children: [
          Icon(Icons.payment,color: Colors.blue,size: 40,),
          SizedBox(height: 20,),
          Text("Payment",style: TextStyle(color: Colors.blue,fontSize: 20),),
        ],
      ),
    ),
  );
}
MenuPage.dart
import 'package:flutter/material.dart';
import 'menu_item.dart';

class MenuPage extends StatelessWidget {


   late MenuItemlist currentItem;
   late ValueChanged<MenuItemlist> onSelecteItem;
   MenuPage({required this.currentItem,required this.onSelecteItem});


   @override
  Widget build(BuildContext context) => Theme(
    data: ThemeData.dark(),
    child: Scaffold(
      backgroundColor: Colors.indigo,
      body: Column(
        children: <Widget>[
          Spacer(),
          ...MenuItems.all.map(buildMenuItem).toList(),
          Spacer(flex: 2,),

        ],
      ),

    ),
  );
  Widget buildMenuItem(MenuItemlist item) => ListTileTheme(
    selectedColor: Colors.grey.shade800,
    child: ListTile(
       selectedTileColor: Colors.white,
       selected: currentItem == item,
       minLeadingWidth: 20,
       leading: Icon(item.icon),
       title: Text(item.title),
       onTap: () => onSelecteItem(item),
    ),
  );
}
In the MenuPage.dart file you also have to create one more class like MenuItems which stores all the page’s Titles and Icons
class MenuItems{
  static const payment =   MenuItemlist('Payment',Icons.payment);
  static const promos =   MenuItemlist('Promo',Icons.card_giftcard);
  static const notification =   MenuItemlist('Notification',Icons.notifications);
  static const help =   MenuItemlist('Help',Icons.help);
  static const aboutUs =   MenuItemlist('About Us',Icons.info_outline);
  static const rateUs =   MenuItemlist('Rate Us',Icons.star_border);

  static const all = <MenuItemlist>[
    payment,
    promos,
    notification,
    help,
    aboutUs,
    rateUs
  ];
}
In this class your also specify and create the model MenuItemlist class like this
MenuItemlist.dart
import 'package:flutter/material.dart';

class MenuItemlist{
  final String title;
  final IconData icon;

  const MenuItemlist(this.title,this.icon);
}
Now you create to all the pages which you want to show in the Navigation Drawer like this
PromoPage.dart
import 'package:flutter/material.dart';

import 'menuwidget.dart';

class PromoPage extends StatelessWidget {
  const PromoPage({Key? key}) : super(key: key);

  @override
  Widget build(BuildContext context) {
    return Scaffold(
      appBar: AppBar(
        backgroundColor: Colors.redAccent,
        title: Text('Promo Page'),
        leading: MenuWidget(),
      ),
      body: Center(
        child: Column(
          mainAxisAlignment: MainAxisAlignment.center,
          children: [
            Icon(Icons.card_giftcard,color: Colors.redAccent,size: 40,),
            SizedBox(height: 20,),
            Text("Promo",style: TextStyle(color: Colors.redAccent,fontSize: 20),),
          ],
        ),
      ),
    );
  }
}
AboutUsPage.dart
import 'package:flutter/material.dart';

import 'menuwidget.dart';

class AboutUsPage extends StatelessWidget {
  const AboutUsPage({Key? key}) : super(key: key);

  @override
  Widget build(BuildContext context) {
    return Scaffold(
      appBar: AppBar(
        backgroundColor: Colors.orange,
        title: Text('About Us Page'),
        leading: MenuWidget(),
      ),
      body: Center(
        child: Column(
          mainAxisAlignment: MainAxisAlignment.center,
          children: [
            Icon(Icons.card_giftcard,color: Colors.orange,size: 40,),
            SizedBox(height: 20,),
            Text("About US",style: TextStyle(color: Colors.orangeAccent,fontSize: 20),),
          ],
        ),
      ),
    );
  }
}
HelpNDPage.dart
import 'package:flutter/material.dart';

import 'menuwidget.dart';

class HelpNDPage extends StatelessWidget {
  const HelpNDPage({Key? key}) : super(key: key);

  @override
  Widget build(BuildContext context) {
    return Scaffold(
      appBar: AppBar(
        backgroundColor: Colors.brown,
        title: Text('Help Page'),
        leading: MenuWidget(),
      ),
      body: Center(
        child: Column(
          mainAxisAlignment: MainAxisAlignment.center,
          children: [
            Icon(Icons.help,color: Colors.brown,size: 40,),
            SizedBox(height: 20,),
            Text("Help",style: TextStyle(color: Colors.brown,fontSize: 20),),
          ],
        ),
      ),
    );
  }
}
NotificationND.dart
import 'package:flutter/material.dart';

import 'menuwidget.dart';

class NotificationNDPage extends StatefulWidget {
  const NotificationNDPage({Key? key}) : super(key: key);

  @override
  State<NotificationNDPage> createState() => _NotificationNDPageState();
}

class _NotificationNDPageState extends State<NotificationNDPage> {
  @override
  Widget build(BuildContext context) {
    return Scaffold(
      appBar: AppBar(
        backgroundColor: Colors.yellow,
        title: Text('Notification Page'),
        leading: MenuWidget(),
      ),
      body: Center(
        child: Column(
          mainAxisAlignment: MainAxisAlignment.center,
          children: [
            Icon(Icons.notifications,color: Colors.yellow,size: 40,),
            SizedBox(height: 20,),
            Text("Notification",style: TextStyle(color: Colors.yellow,fontSize: 20),),
          ],
        ),
      ),
    );
  }
}
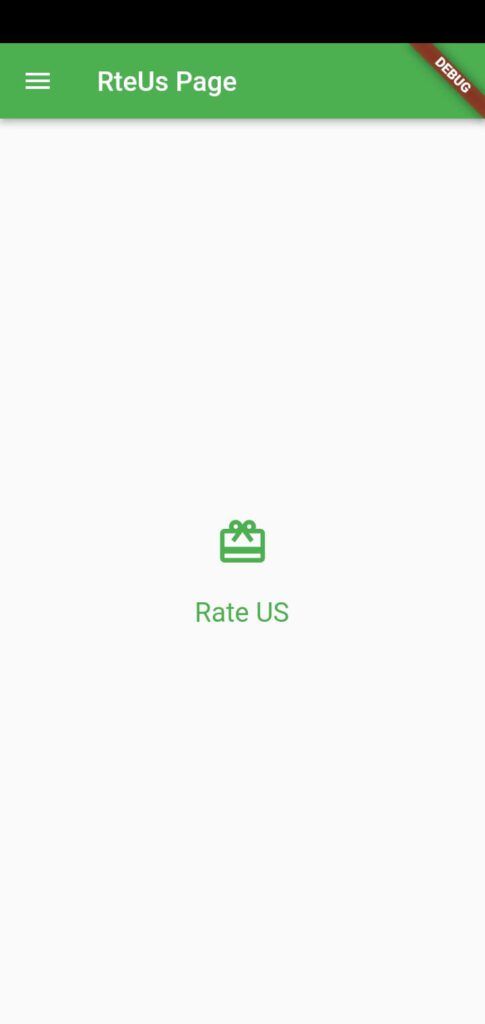
RateUsPage.dart
import 'package:flutter/material.dart';

import 'menuwidget.dart';

class RateUsPage extends StatefulWidget {
  const RateUsPage({Key? key}) : super(key: key);

  @override
  State<RateUsPage> createState() => _RateUsPageState();
}

class _RateUsPageState extends State<RateUsPage> {
  @override
  Widget build(BuildContext context) {
    return Scaffold(
      appBar: AppBar(
        backgroundColor: Colors.green,
        title: Text('RteUs Page'),
        leading: MenuWidget(),
      ),
      body: Center(
        child: Column(
          mainAxisAlignment: MainAxisAlignment.center,
          children: [
            Icon(Icons.card_giftcard,color: Colors.green,size: 40,),
            SizedBox(height: 20,),
            Text("Rate US",style: TextStyle(color: Colors.green,fontSize: 20),),
          ],
        ),
      ),
    );
  }
}
Step 6: Create MenuWidget.dart file
In all the pages you see the leading: MenuWidget() class which is indicate and creates an icon that shows all the page’s menu icons. when the user clicks this icon then toggle the Drawer and show all the pages listed like this.
MenuWidget.dart
import 'package:flutter/material.dart';
import 'package:flutter_zoom_drawer/flutter_zoom_drawer.dart';

class MenuWidget extends StatelessWidget {
  const MenuWidget({Key? key}) : super(key: key);

  @override
  Widget build(BuildContext context) =>IconButton(
      icon: Icon(Icons.menu),
      onPressed: () {
        ZoomDrawer.of(context)!.toggle();
      },
  );
}
Now you crate all the classes and Pages’ last things to add or call all the classes in a single in HomePageNavDrawer.dart class like this
import 'package:flutter/material.dart';
import 'package:flutter_zoom_drawer/flutter_zoom_drawer.dart';
import 'package:navigationdrawer/NavigationDrawer/help_page.dart';
import 'package:navigationdrawer/NavigationDrawer/menu_item.dart';
import 'package:navigationdrawer/NavigationDrawer/notification_page.dart';
import 'package:navigationdrawer/NavigationDrawer/payment_page.dart';
import 'package:navigationdrawer/NavigationDrawer/promo_page.dart';
import 'package:navigationdrawer/NavigationDrawer/rate_us_page.dart';
import 'about_us_page.dart';
import 'menu_page.dart';
class HomePageNavDrawer extends StatefulWidget {
const HomePageNavDrawer({Key? key}) : super(key: key);
@override
State<HomePageNavDrawer> createState() => _HomePageNavDrawerState();
}
class _HomePageNavDrawerState extends State<HomePageNavDrawer> {
MenuItemlist currentItem = MenuItems.payment;
@override
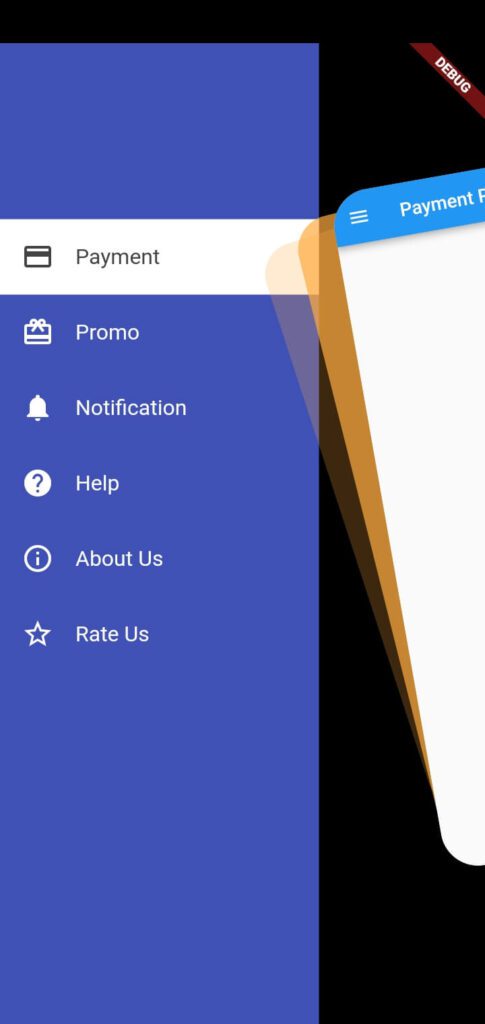
Widget build(BuildContext context) => ZoomDrawer(
borderRadius: 40,
angle: -10,
slideWidth: MediaQuery.of(context).size.width * 0.8,
showShadow: true,
drawerShadowsBackgroundColor: Colors.orangeAccent,
mainScreen: getScreen(),
menuScreen: Builder(
builder: (context) => MenuPage(
currentItem: currentItem,
onSelecteItem: (item){
setState(() => currentItem = item);
ZoomDrawer.of(context)!.close();
}
),
),
);
Widget getScreen(){
switch (currentItem){
case MenuItems.payment:
return PaymentPage();
case MenuItems.promos:
return PromoPage();
case MenuItems.notification:
return NotificationNDPage();
case MenuItems.help:
return HelpNDPage();
case MenuItems.aboutUs:
return AboutUsPage();
case MenuItems.rateUs:
default:
return RateUsPage();
}
}
}
Output
Conclusion
In this tutorial, we learned how to add the navigation drawer in Flutter with practical examples. we add flutter_zoom_drawer 3.0.3 Package to our project and create a new Drawer that attracts the new users you can also explore all the functionality of this package link we have given.
Thanks for reading this article ❤
If I got something wrong? Let me know in the comments. I would love to improve.
Clap 👏 If this article helps you.
If we got something wrong? Let me know in the comments. we would love to improve or if you like my work then you also check out our more interesting articles like How to create a Scratch Card in flutter using a scratcher package, How To Hide Bottom Navigation Bar On Scroll in Flutter, How to implement ListWheelScrollView in Flutter.